EN
EN
 AR
AR
 CS
CS
 DA
DA
 NL
NL
 FI
FI
 FR
FR
 DE
DE
 EL
EL
 HI
HI
 IT
IT
 JA
JA
 KO
KO
 PL
PL
 PT
PT
 RU
RU
 ES
ES
 SV
SV
 IW
IW
 ID
ID
 LV
LV
 LT
LT
 SR
SR
 SK
SK
 SL
SL
 UK
UK
 VI
VI
 ET
ET
 HU
HU
 MT
MT
 TH
TH
 TR
TR
 FA
FA
 MS
MS
 GA
GA
 HY
HY
 UR
UR
 BN
BN
 GU
GU
 TA
TA


Preparing Your Home for Window Installation: Your Essential Checklist
Replacing your windows is an exciting home improvement project that can enhance your comfort, energy efficiency, and curb appeal. But before the installers arrive with your beautiful new windows, there's crucial preparation needed on your part. Taking these steps ensures the installation goes smoothly, safely, and efficiently, protecting your home and belongings while minimizing stress.
Think of it as setting up a safety zone for your family and possessions, and creating an efficient workspace for the professionals. A little preparation upfront can prevent delays, potential damage, and unnecessary hassles on installation day.
Here’s your comprehensive checklist to get your home ready:
-
Inside the Home: Clearing and Protecting
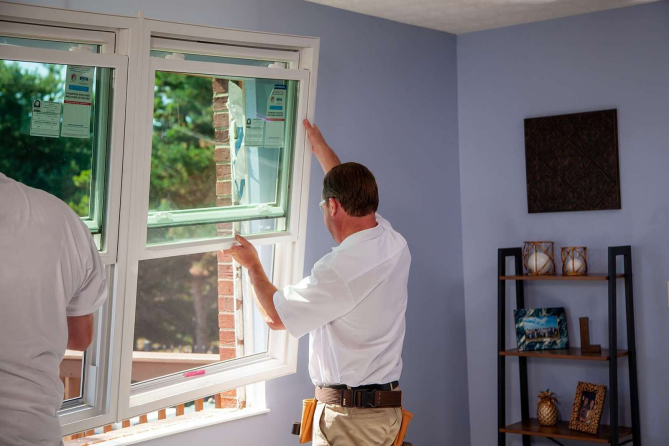
Clear the Work Zone: Move all furniture, decorations, plants, and valuables at least 3-4 feet away from the windows being replaced. This creates a safe buffer zone for the installers to work freely and prevents accidental bumps or damage to your belongings. Imagine needing to maneuver a large window frame – ample space is essential!
Remove Window Treatments: Take down all curtains, blinds, shades, draperies, and any associated hardware (rods, brackets). This gives the installers unobstructed access to the window frame and prevents these items from getting dusty or damaged during the removal process.
Protect Floors and Furniture: Cover the floors surrounding the work area and any nearby furniture that couldn't be moved with drop cloths, plastic sheeting, or old blankets. Window removal can generate dust, debris, and old materials like insulation or caulk – protection is key to keeping your home clean.
Secure Children and Pets: For everyone's safety and to avoid disruptions, keep children and pets completely away from the work area. Consider moving them to a different part of the house during the installation or arranging for them to be elsewhere (e.g., daycare, pet sitter, a friend's house).
-
Outside the Home: Access and Pathways
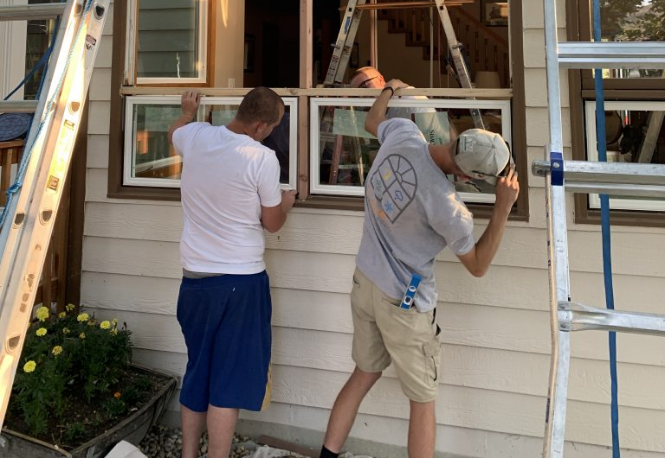
Clear the Perimeter: Remove any outdoor furniture, grills, garden tools, decorative items, potted plants, or other obstacles from the immediate vicinity of the windows being replaced. Installers need clear access to the exterior of the windows for removal and installation.
Trim Landscaping: Prune any overgrown bushes, shrubs, or tree branches that could block access to the windows or impede the installers' movement. This is especially important for ground-floor windows.
Clear the Path: Ensure there's a clear, unobstructed path from the driveway or street to the work area around your house. This allows installers to bring tools, materials, and the new windows in and out easily.
Clear the Driveway: If possible, clear your driveway to provide space for the installation crew's vehicle(s) and for staging materials like the new windows. Let them know if parking is tricky beforehand.
- Other Key Preparations
Communicate with Your Contractor: Before installation day, have a final conversation with your contractor. Confirm the arrival time, discuss the plan, mention any specific requests or concerns (e.g., disposal of old windows), and ensure you're both on the same page.
Disable Your Alarm System: If you have a home security system, contact your alarm company in advance to arrange for the temporary disabling of sensors on the windows being replaced. This prevents false alarms triggered during the installation process.
Provide Power Access: Ensure there is easy access to power outlets near the work area. Installers will likely need to use power tools (drills, saws) and possibly vacuums for cleanup.
Be Prepared to Ask Questions: Installation day is a great opportunity! Have your list of questions ready for the crew lead about the windows themselves, operation, maintenance, warranties, or the installation process. They are the experts on the spot.
Pro Tip: While installers are working, it's helpful to have a homeowner present (or easily reachable) to answer any unexpected questions that might arise and to do a final walk-through once the job is complete.
By following this checklist, you transform installation day from a potential headache into a smooth and successful project. You'll protect your home, respect the crew's time and effort, and be one step closer to enjoying your brand-new windows!
Related Resources You Might Find Useful:
Understanding Window Types: If you're still deciding on styles (e.g., double-hung vs. casement) or materials (vinyl, wood, fiberglass), many window manufacturer websites offer detailed guides and comparisons.
Post-Installation Care: Look up care instructions specific to your new window type and frame material to ensure longevity and optimal performance. Your contractor should also provide this information.
Energy Efficiency Benefits: Research how your new windows contribute to lower energy bills and a more comfortable home environment. Organizations like Energy Star provide helpful information on energy-efficient windows.